Sharing statements between courses
This guide relates specifically to implementing xAPI within traditional e-learning courses created using common authoring tools. xAPI is also used in more innovative learning solutions. You can read more about statements here.
xAPI enables to you link together elements of your blended learning solution. This page explores the practical steps you can take to apply this principle in a small pilot project. Blended Learning is most effective when different channels (face to face, email, e-learning) are blended together, but to keep things simple, this page focuses on blending together two e-learning courses created in off-the-shelf authoring tools such as Articulate Storyline, Adobe Captivate and similar products.
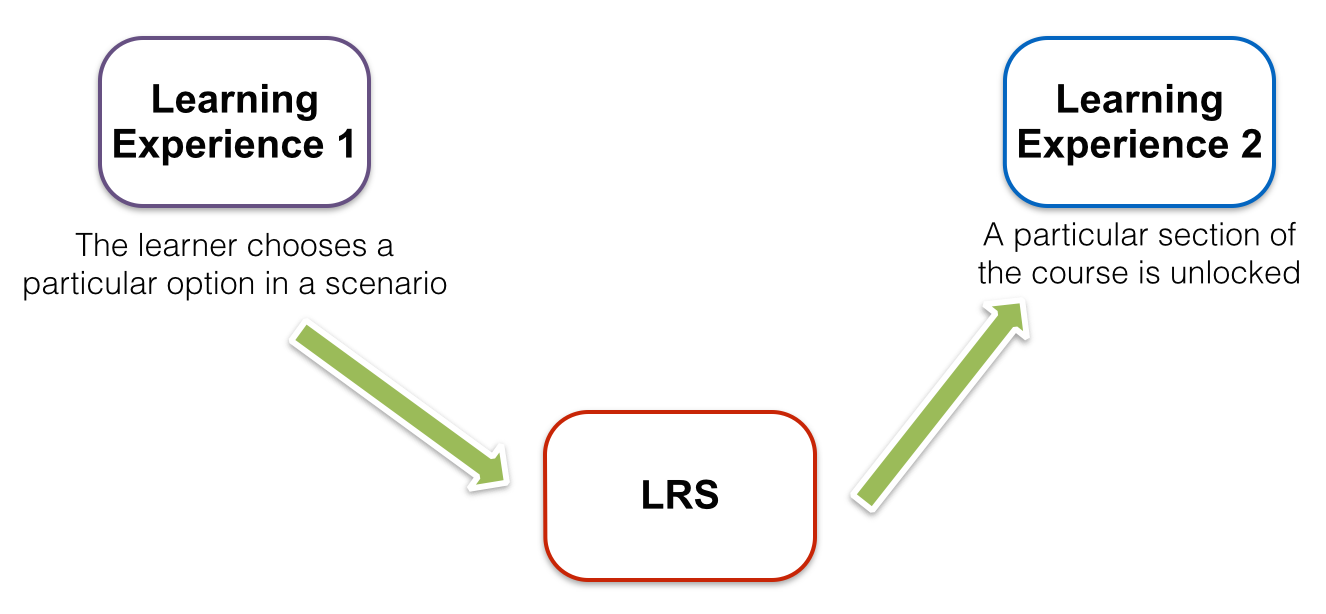
You could create something that looks a bit like this:
Design
The first step in your pilot project is to design two inter-connected learning experiences that you can create in your authoring tool. Perhaps this could be two role-play experiences where the learner is presented with a scenario and has to respond appropriately through a series of events. You could include one scenario per e-learning course and have the second scenario adjust the options available and final outcome be dependant on action taken in the first scenario. If the first scenario was ‘Preparing to visit a prospect’ and the second scenario was ‘Speaking to a prospect’ then the learner will have a harder time in the second scenario if they failed to prepare well in the first.
Take time to map out both your scenarios and the links between them. Which triggers in the first scenario will cause which events to occur in the second? Write down all these links and and data that might be needed. You’ll then need to design statements for each link.
With your design in place, your next task is to set up the first course to send the necessary data to the LRS and the second course to retrieve it.
Incorporating TinCanJS
In order to send or retrieve any xAPI data, you’ll need to include TinCanJS in your published packages. You can download the latest version of TinCanJS from Github and drop tincan-min.js from the build folder into the root directory of the published package. You’ll also need to link to TinCanJS from the published html file (this might be called something like index.html or story.html) by adding the following code:
<script src="tincan-min.js"></script>
With TinCanJS included, you’re now ready to send and receive statements.
Sending Statements from Course 1
Within the first course, you’ll need to use your authoring tool’s actions features to trigger some JavaScript at the point you want to send the statement. Actions features for different authoring tools work in different ways, so see your authoring tool vendor if you need help with this part.
You’ll then use code that looks a bit like this:
var tincan = new TinCan ({url: window.location.href});

tincan.sendStatement(
    {
        verb: {
            id: "http://example.com/verbs/some-verb"
        },
        object: {
            id: "http://your-organizations.website/tincanapi/activities/unique-id-for-action"
        }
    }
);
This code sets up TinCanJS to get it’s LRS and learner details from the query string passed to your e-learning content when it’s launched. This will be the same data used by the authoring tool to send its own default xAPI statements.
Next, it sends a xAPI statement to the LRS, with the current learner as the actor. The statement is very basic for the purposes of the example and as a minimum you’ll want to replace the verb and object ids. Each action you track (e.g. clicking a button) should have a unique object id. See Statements 101 for more on how to craft statements.
Retrieving Statements in Course 2
With the statements stored in the LRS, we now need to get the data into the second e-learning course. In this case we just want to know ‘Does a statement matching a certain verb and object and the currently learner exist in the LRS?’ or to put it another way, ‘did the learner do the thing?’.
Again, use your authoring tool’s actions features to trigger some JavaScript:
var tincan = new TinCan ({url: window.location.href});
var statementFound = false;
var result = tincan.getStatements({
    sendActor: true,
    params: {
        verb: {
            id: "http://example.com/verbs/some-verb"
        },
        activity: {
            id: "http://your-organizations.website/tincanapi/activities/unique-id-for-action"
        }
    },
    callback: function (err, result) {
        if (result.statements.length > 0) {
            statementFound = true;
	 //Insert authoring tool specific code here.
        }
    }
});
You should change the verb and activity ids to the verb and activity ids you want to communicate in this statement.
The code here fetches matching statements from the LRS and, when it gets the data back, counts those statements. If there’s 1 or more statement returned, it sets the variable statementFound to true.
From here, you’ll need to trigger an action in your authoring tool if statementFound is true. Again, the specifics of how to achieve this will vary from authoring tool to authoring tool, so discuss this with your authoring tool vendor. In most authoring tools you’ll use the JavaScript to change a variable within the authoring tool and then adapt the learner’s experience based on the value of that variable.
Getting help and going further
If you run into any difficulties getting this example working in your authoring tool, please get in touch. Once you have a handle on how this works, you can take it further by sending more detailed statements and/or pulling in data from other experiences beyond e-learning courses.
If you also want to store and retrieve learner preferences and settings across courses or share data between learners for team based or competitive learning experiences, you could use documents instead of statements. See Sharing documents between courses or learners for details.
Note that to keep things simple, the code samples above don’t include any error handling in case connection to the LRS is lost. It might be helpful to add this in to give your learners a smoother experience in the event something goes wrong.
Having completed this tutorial, take a look at the developer section to diver deeper into xAPI.
Need a little extra help to implement this in your course? Get in touch.